Process flow formatters in ServiceNow’s native view offer a visual representation of a record’s state progression. While not interactive, they can be prominently displayed at the top of the record. However, as we began migrating to workspaces, these visuals became less configurable in the new UI.

In this article, we will detail the steps to configure a component that performs the same function within workspaces – the stepper component.

Configuration steps
To add the stepper component to Change Request record page in CSM/FSM configurable workspace, follow the steps listed below.
Modify the record page for Change
- Set the application scope to ‘CSM Configurable Workspace’.
- Navigate to UI builder.
- From the ‘Experiences’ list, look for and open the ‘CSM/FSM Configurable Workspace’ record.
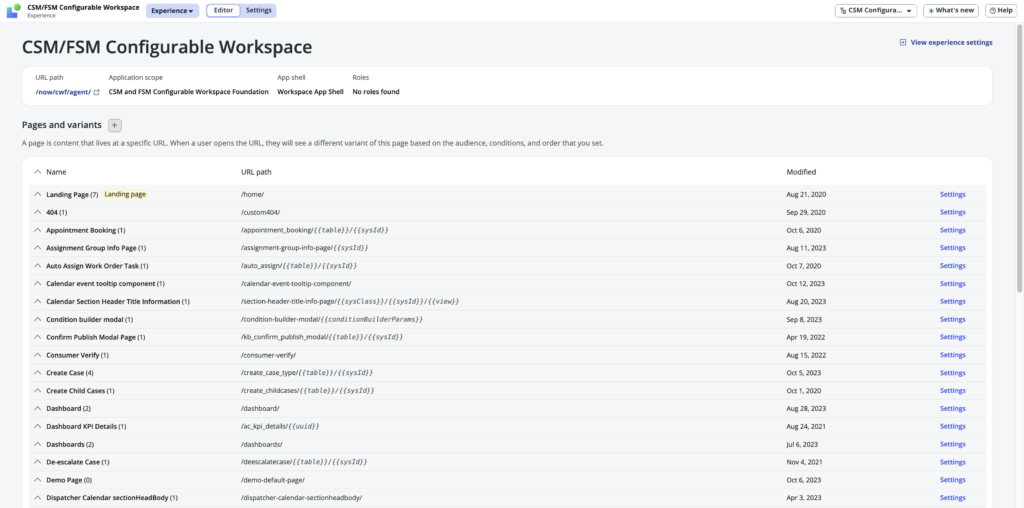
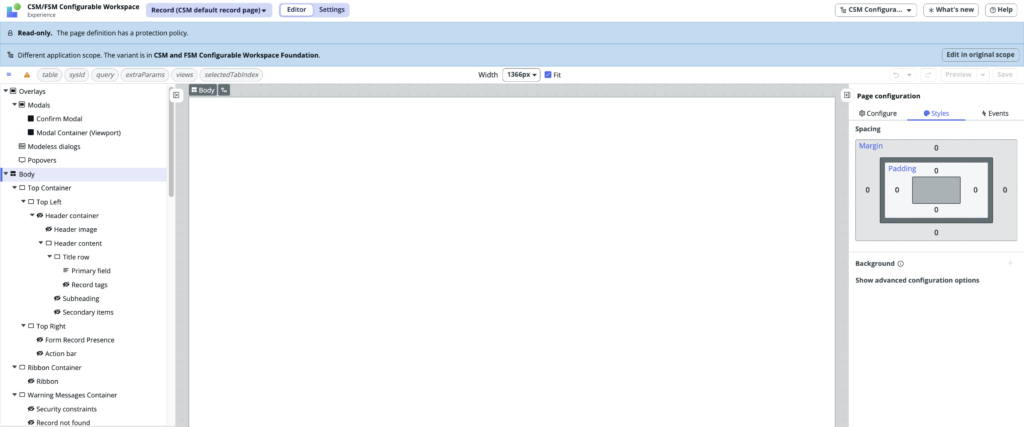
- Under the ‘Pages and variants’ list, look for and open the ‘CSM default record page’ record. Notice that the page is read-only.

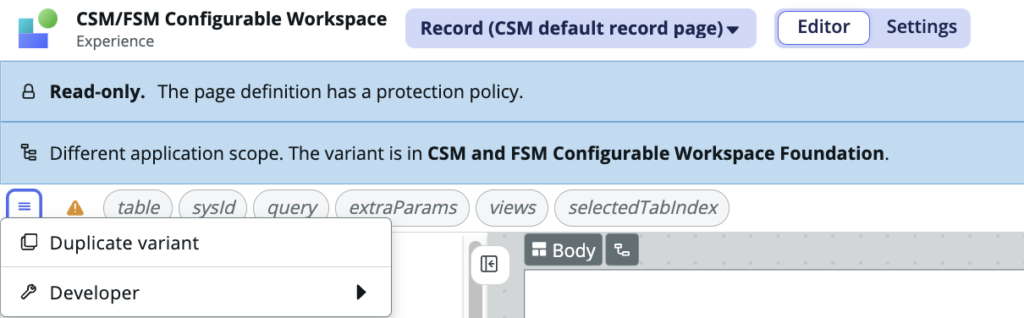
- Use the hamburger menu present at the top left corner to create a duplicate of this OOB page.
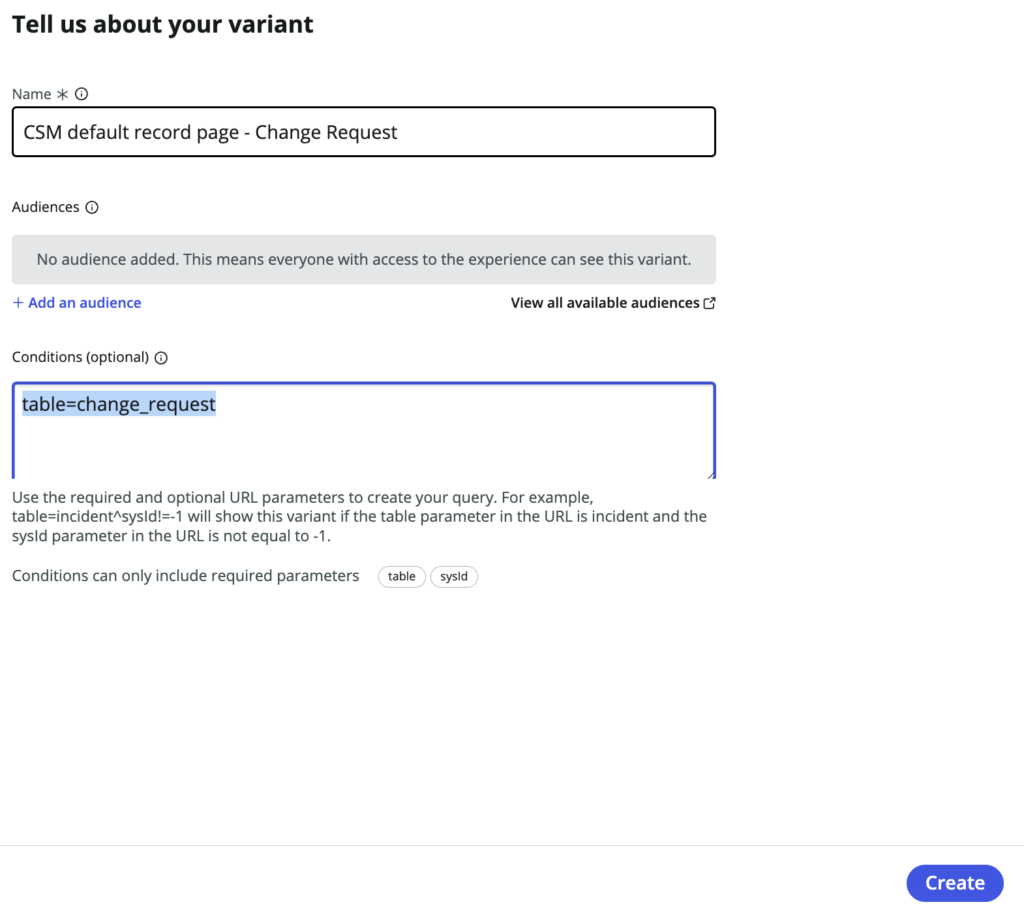
- Give the page variant a desired name, condition needs to be set as ‘table=change_request’ as we want it to be visible for Change Requests only.
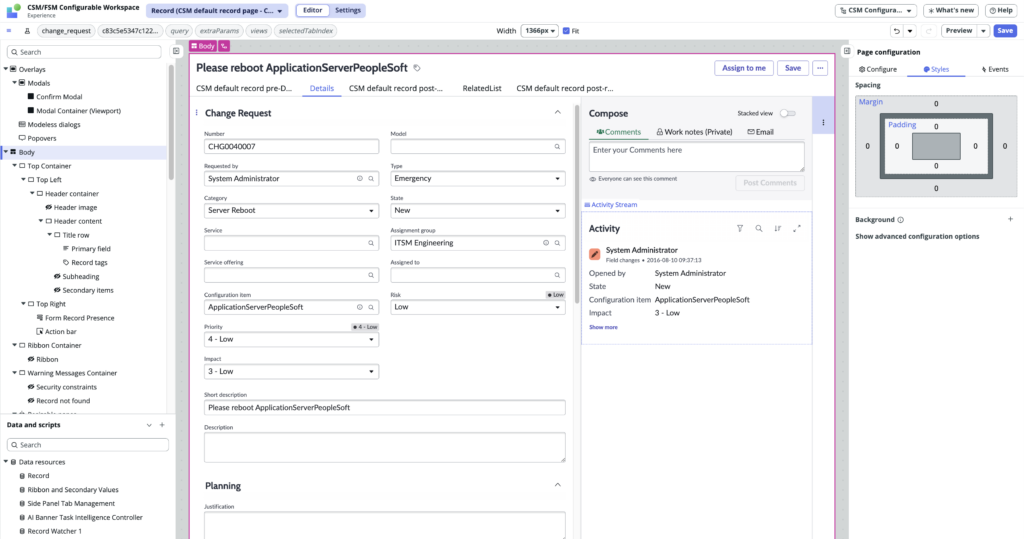
- The new variant will be ready in a few seconds and open up on your screen. Notice that the page is now editable.
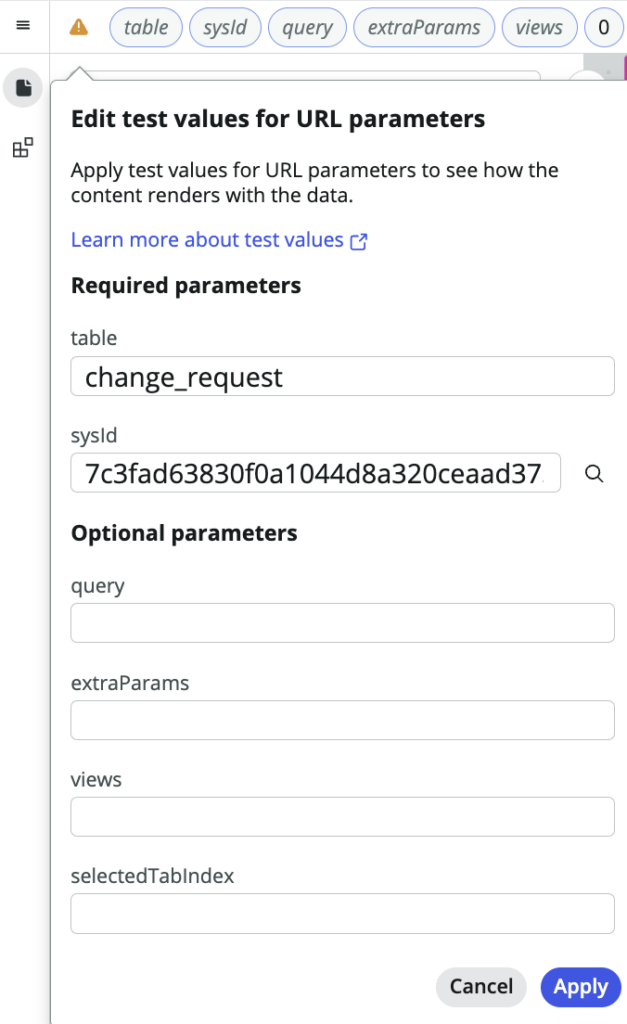
- The body section of the page would initially be blank, we can fill it up by applying test values from the top left.
Add the Stepper Component
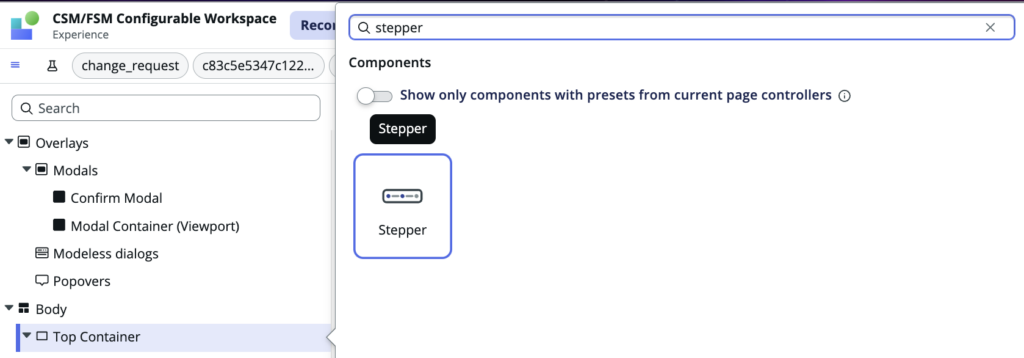
- Using the components panel on the left, look for ‘Top Container’ and select it.
- Using the three dots beside the component, click on ‘Add after’ and select the ‘Stepper’ component from the popup.
- Save the UIB configurations using the ‘Save’ button at the top right.
- The stepper component comes with a set of static values which can be viewed in the ‘Config’ tab on the right panel. Next, we need a data resource to dynamically set the ‘Items’ array based on the record that is on screen.
- ‘Items’ array –
[
    {
        "id": "step1",
        "label": "Not started",
        "progress": "none"
    },
    {
        "id": "step2",
        "label": "Active",
        "progress": "partial"
    },
    {
        "id": "step3",
        "label": "In progress",
        "progress": "partial"
    },
    {
        "id": "step4",
        "label": "Complete",
        "progress": "done",
        "disabled": true
    }
]
Create a Transform Data Resource
- From the bottom left section of UIB, proceed to create a new data resource of type ‘Transform’.
- Alternatively, navigate to the table ‘sys_ux_data_broker_transform’ to create the data resource.
- Set the values as below and save the record.
- Name – ‘GetStateSchema’ (any unique name should be fine)
- Properties – JSON of inputs available to the data resource
- Script – server script to process the input and return an output for the stepper component
- Properties (refer to OOB data resources to understand the format).
[
  {
    "name": "table",
    "label": "Table",
    "description": "Table name of the record.",
    "readOnly": false,
    "fieldType": "string",
    "mandatory": true,
    "defaultValue": ""
  },
  {
    "name": "sys_id",
    "label": "Sys Id",
    "description": "Sys Id of the record.",
    "readOnly": false,
    "fieldType": "string",
    "mandatory": true,
    "defaultValue": ""
  }
]- Script (write logic to use the ‘table’ and ‘sys_id’ inputs and return an array with the format shown in Step 12).
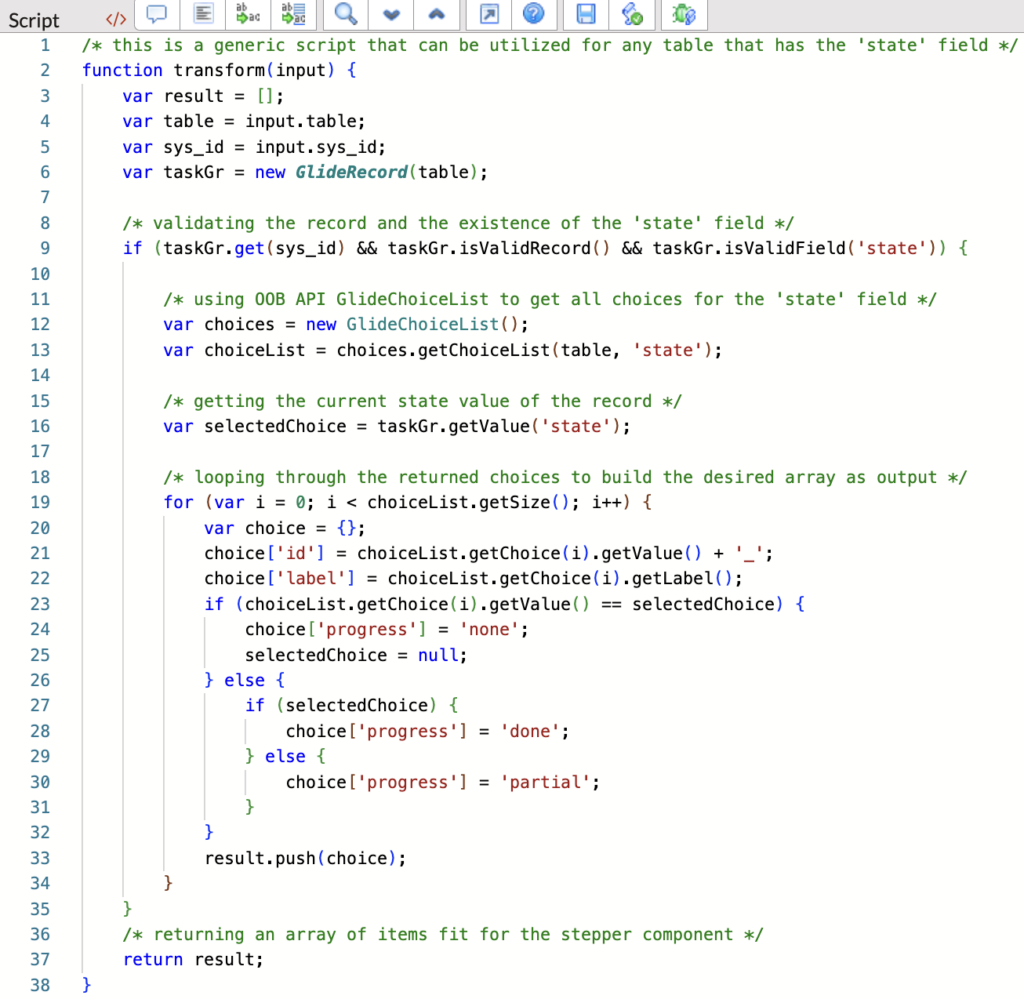
- Copyable version of the script can be found here.
Create an ACL for the Data Resource
- Elevate role to ‘security_admin’.
- Navigate to Access Control [sys_security_acl] and create a new ACL record as below.
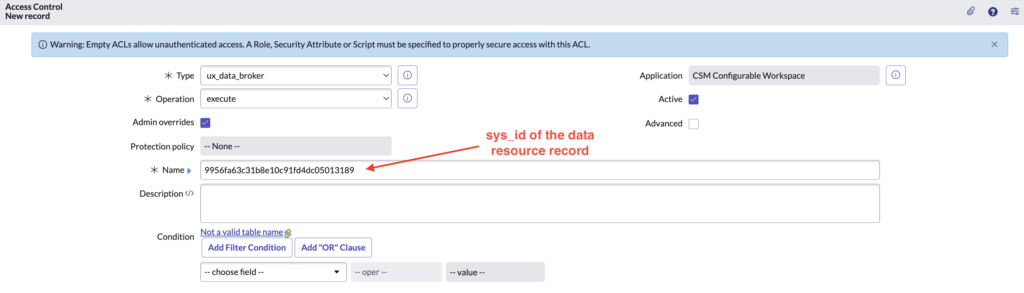
- For roles, any role like ‘itil’ or ‘snc_internal’ should be fine.
Add the Data Resource to the page
- Navigate back to the UIB page we created earlier to add the ‘GetStateSchema’ data resource to the page.
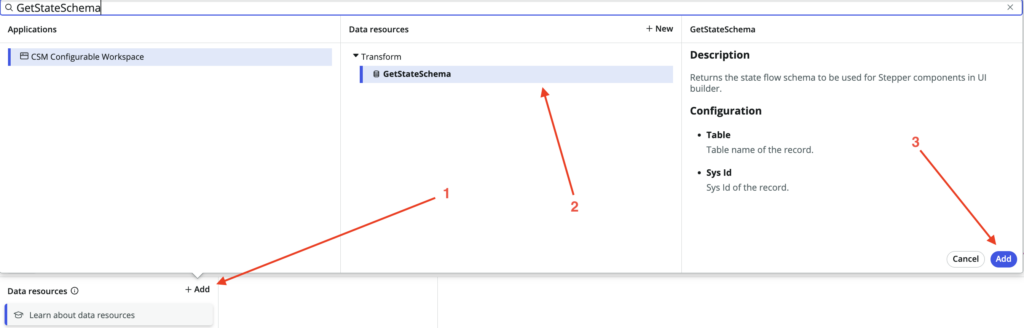
- Select the newly added data resource and use data binding to configure the input values under the ‘Config’ tab.
- Table – ‘@context.props.table’
- Sys Id – ‘@context.props.sysId’

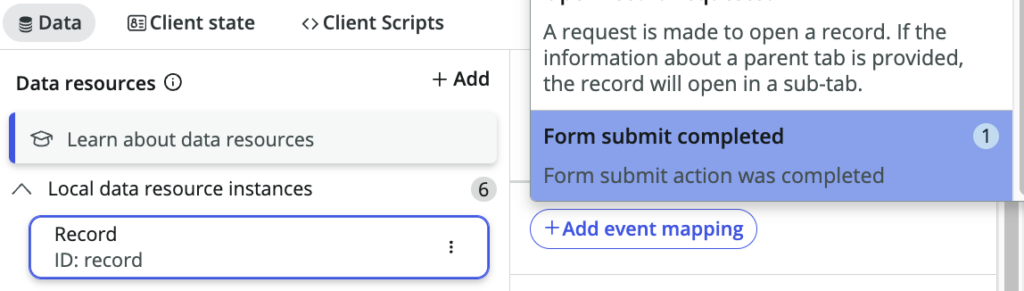
- Select the ‘Record’ data resource from the list.
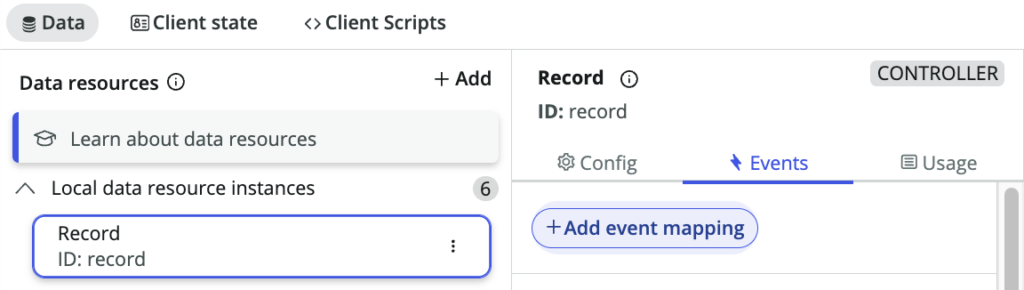
- To ensure that our data resource is refreshed for every record update, under the ‘Events’ tab –
- add a new event mapping for ‘Form submit completed’.
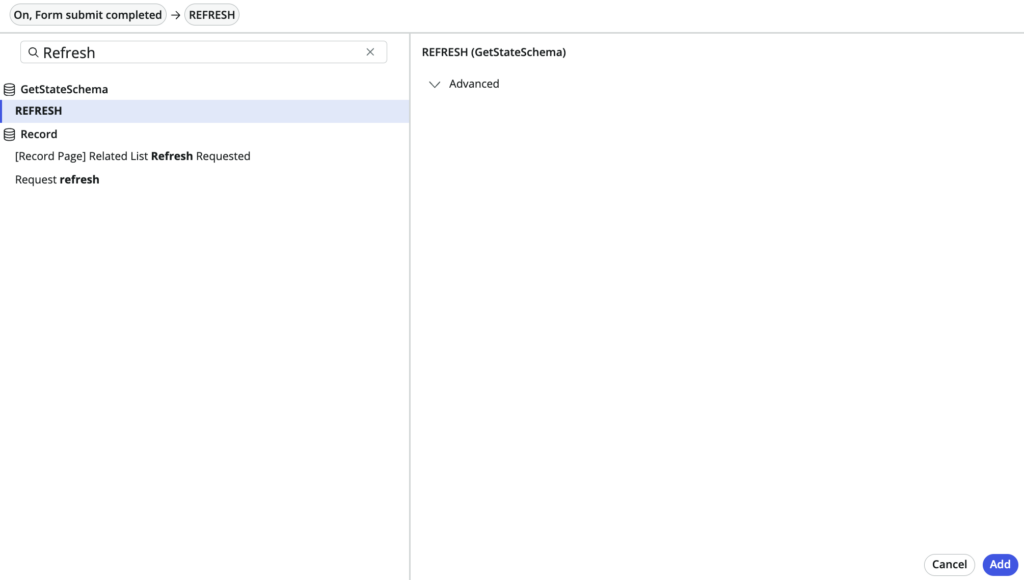
- search for and add the event handler ‘REFRESH’ listed under ‘GetStateSchema’.
- Save the UIB configurations using the ‘Save’ button at the top right.
Update the Stepper Component config
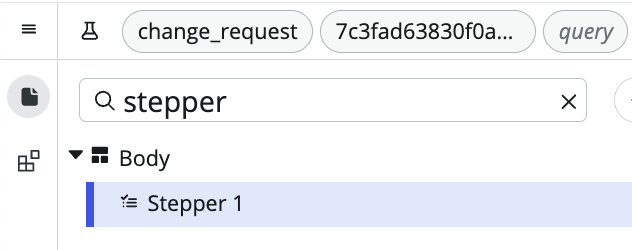
- Using the search bar on the top left, search for the component ‘Stepper’ that we added in Step 10 and select it.
- Navigate to the ‘Config’ tab on the right panel.
- Use data binding to set the value of ‘Items’ to ‘@data.getstateschema.output’ (value may vary and depends on the name of the data resource that was created).
- Use script to set the value of ‘Selected item’ as below.
/**
  * @param {params} params
  * @param {api} params.api
  * @param {TransformApiHelpers} params.helpers
  */
function evaluateProperty({api, helpers}) {
  return api.data.record.form.fields.state.value + '_';
}
- Save the UIB configurations using the ‘Save’ button at the top right.
- Clean the cache with ‘cache.do’.
Verify the configuration
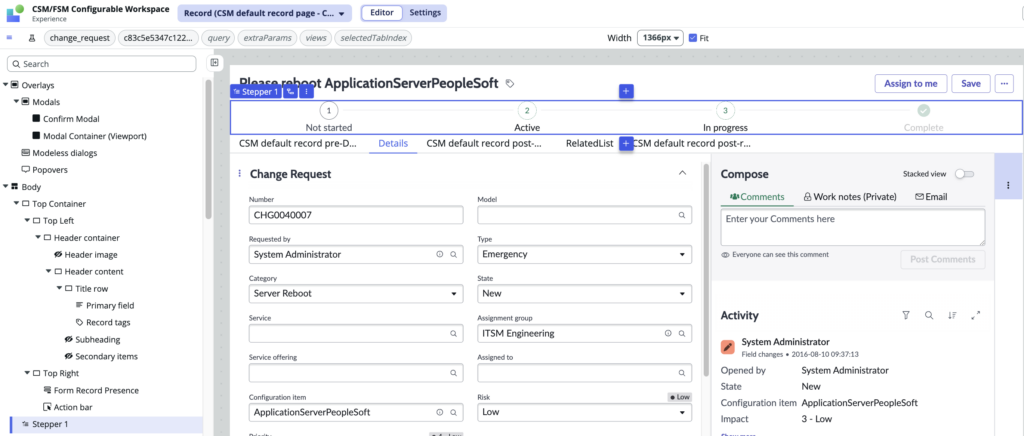
If all the steps have been followed accurately, then Change Request records when opened via the CSM workspace would display a dynamic stepper component with state transitions as below.
If the functionality is not working as expected, backtrack on the mentioned steps and verify whether all of them were executed correctly, else we can always start from the scratch.
Next steps
Figure out what is the best way to replicate the component for other Task records such as Incidents, Problems, etc.