In ServiceNow, there is often a need to synchronize Work Notes and Additional Comments across related task records. This is typically accomplished using a few business rules and logic to prevent looping. In the Customer Service Management (CSM) environment, Additional Comments on case records are primarily used to update the customer. When a case has related records such as case tasks, incidents, etc., how can we better enable agents to communicate seamlessly with the customer from their active task record?
The solution we will discuss in this article might not be the optimal one and is somewhat of an unconventional approach I devised while experimenting with the configurability of configurable workspaces using UI Builder.
Scenario
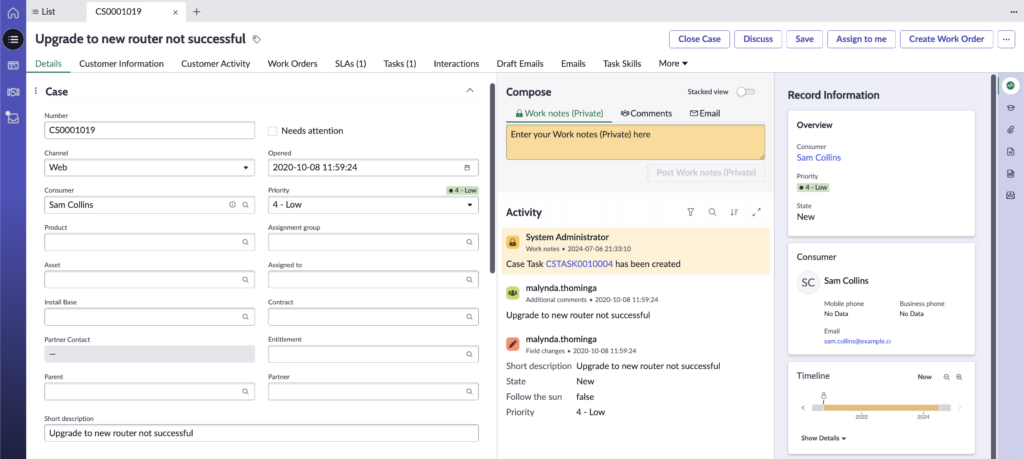
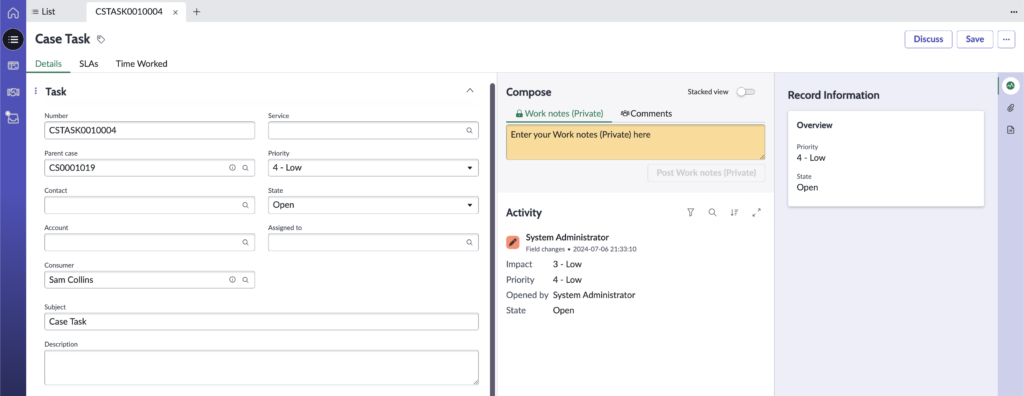
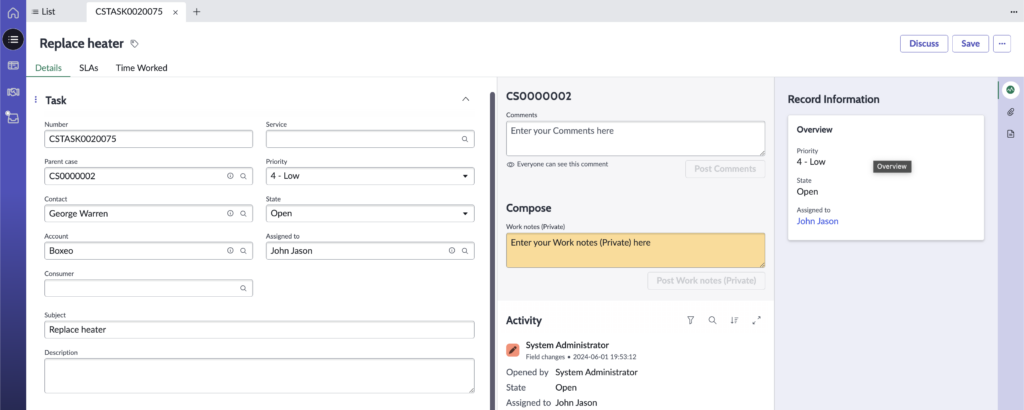
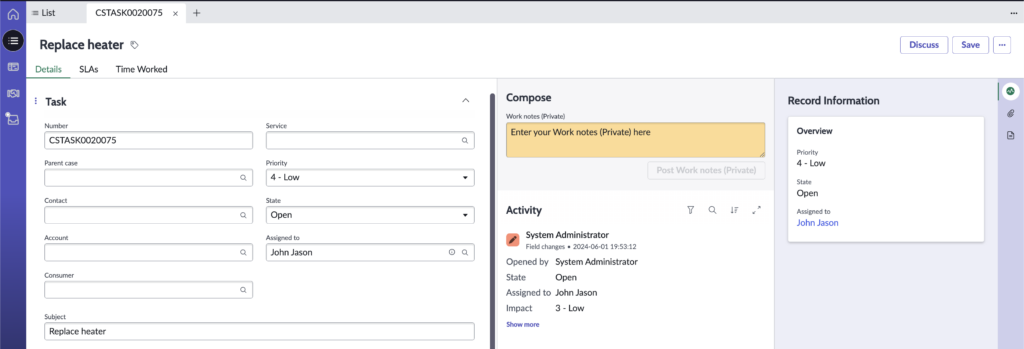
Consider we have Case [sn_customerservice_case] records and Case Task [sn_customerservice_task] records. Agents working on a Case Task should be able to add comments directly to the Case without needing to open the Case record. Screenshots below depict how the OOB (out-of-box) forms look like for a Case and Case Task.
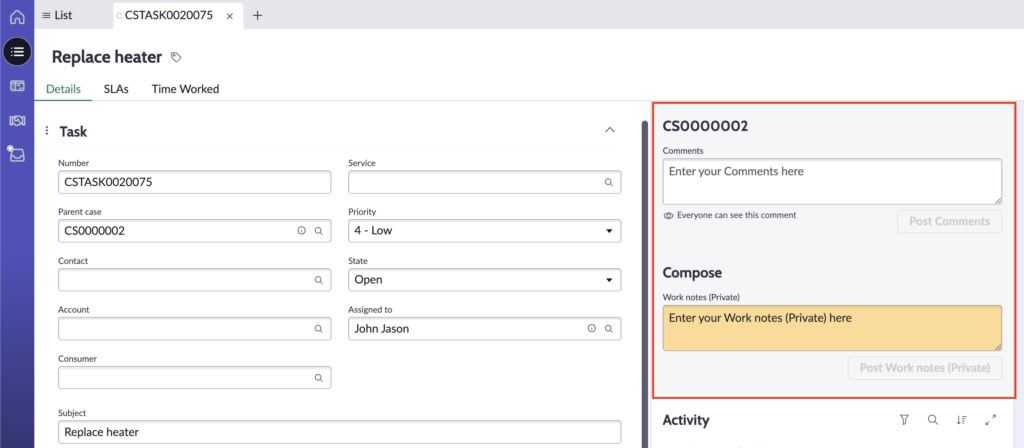
Target view for Agents
With a layout like below, agents working on a Case Task will be able to add comments directly to the Case without needing to open the Case record.
Configuration steps
Follow the steps listed below to add the journal input section of the parent Case record into the Case Task form.
Modify the record page for Case Tasks
- Set the application scope to ‘CSM Configurable Workspace’.
- Navigate to UI builder.
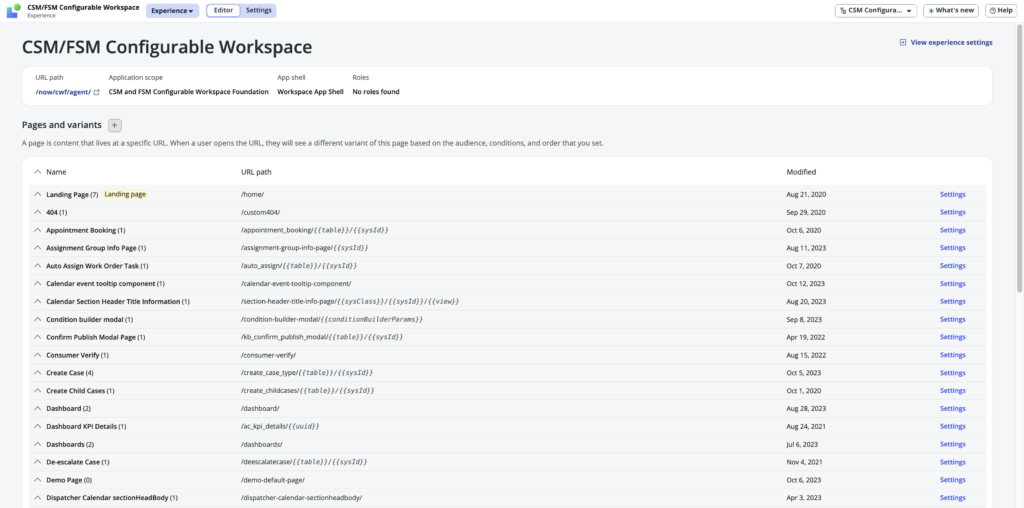
- From the ‘Experiences’ list, look for and open the ‘CSM/FSM Configurable Workspace’ record. https://instance.service-now.com/now/builder/ui/experience/c4e321a3530210102c30ddeeff7b12f6
- Under the ‘Pages and variants’ list, look for and open the ‘CSM default record page’ record. Notice that the page is read-only.

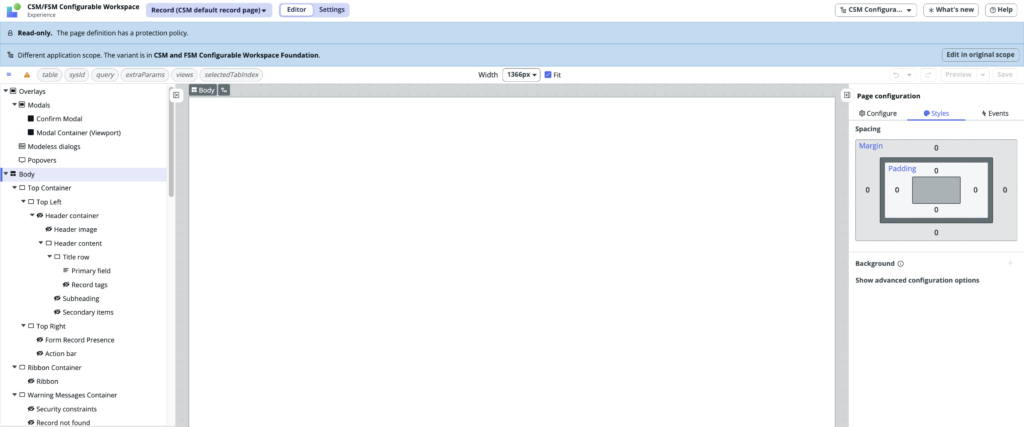
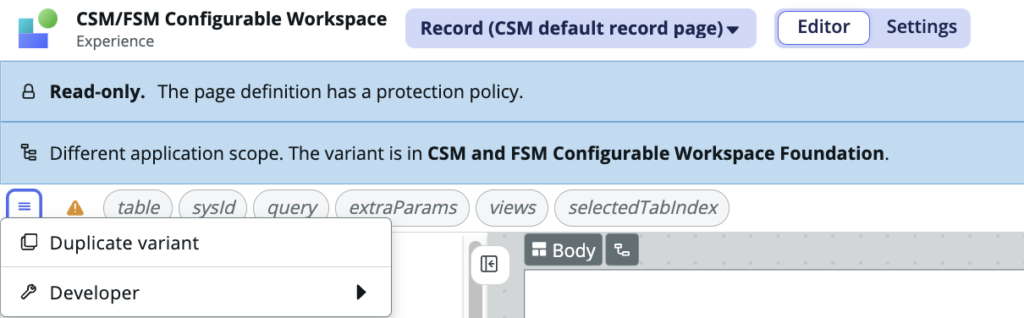
- Use the hamburger menu present at the top left corner to create a duplicate of this OOB page.
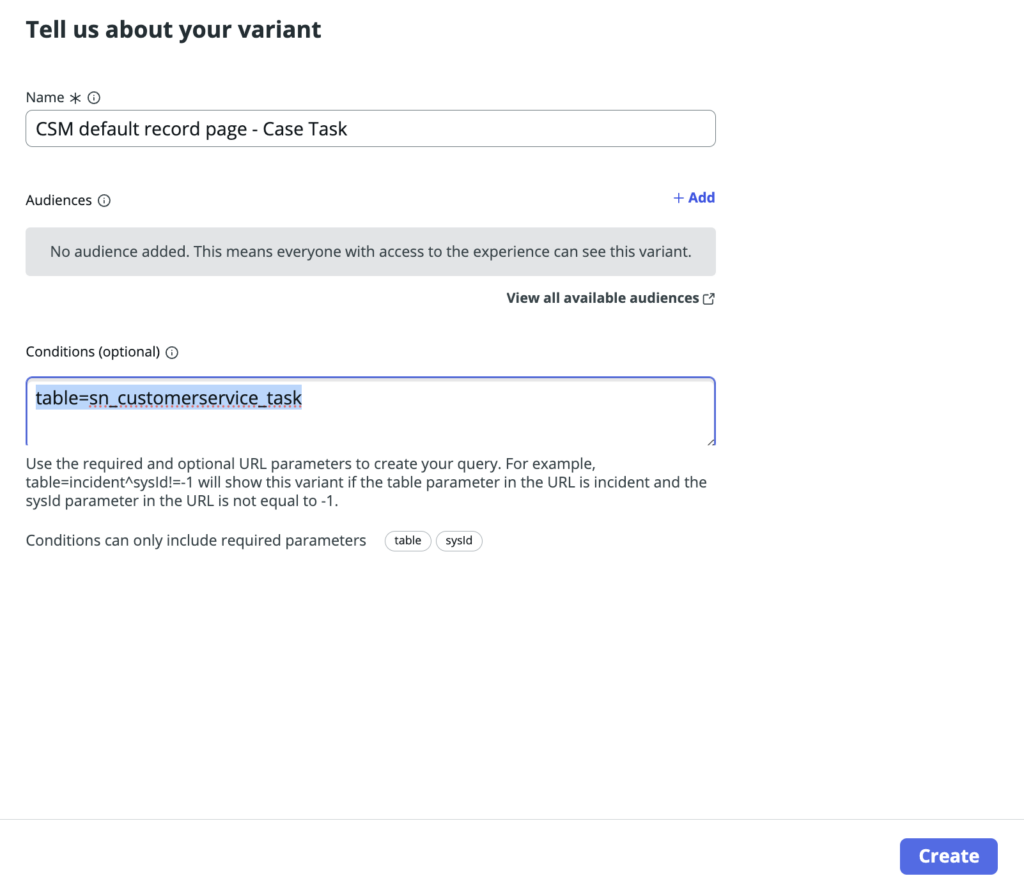
- Give the page variant a desired name, condition needs to be set as ‘table=sn_customerservice_task’ as we want it to be visible for Case Tasks only.
- The new variant will be ready in a few seconds and open up on your screen. Notice that the page is now editable.
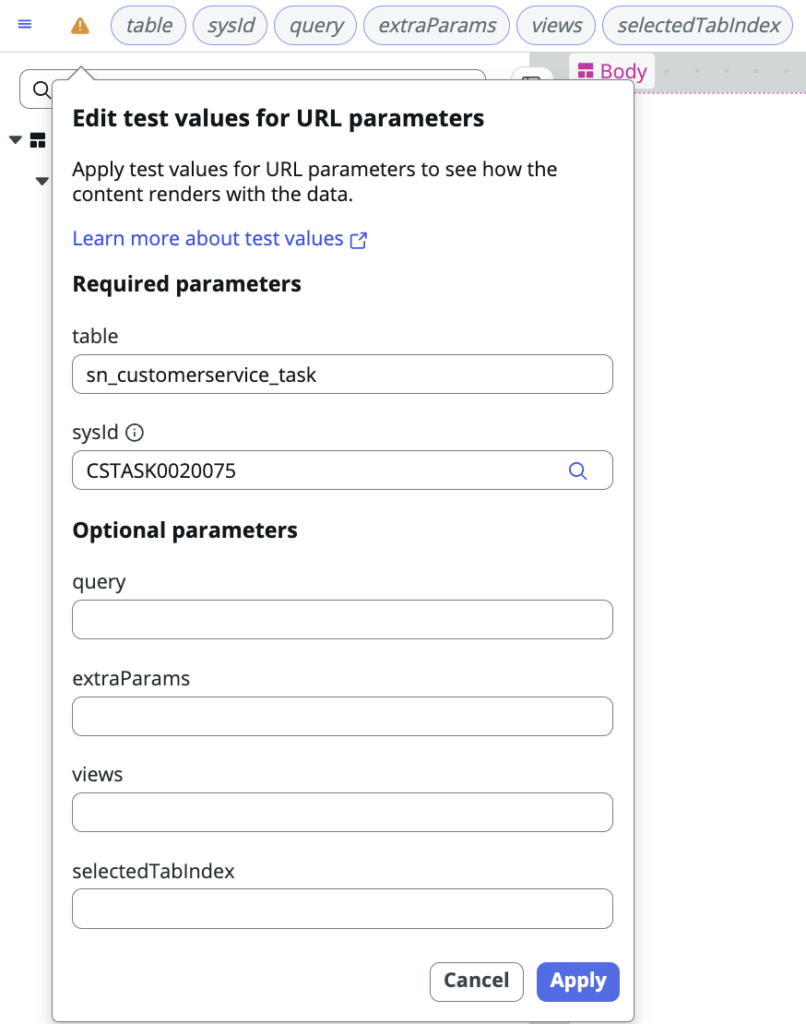
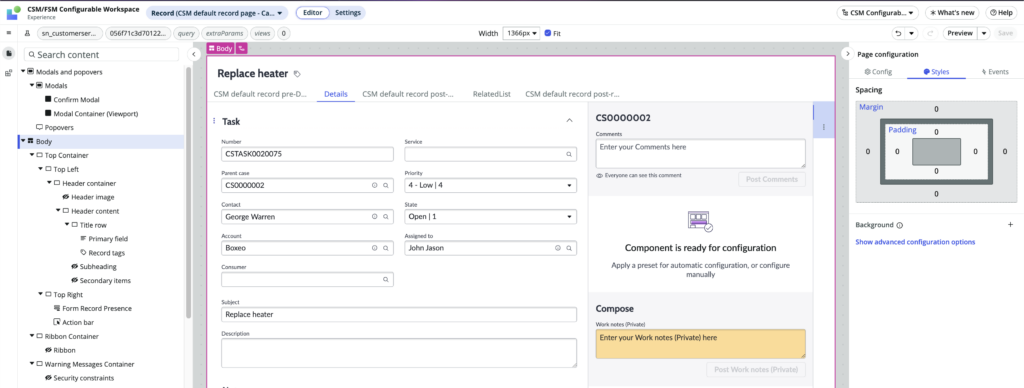
- The body section of the page would initially be blank, we can fill it up by applying test values from the top left.
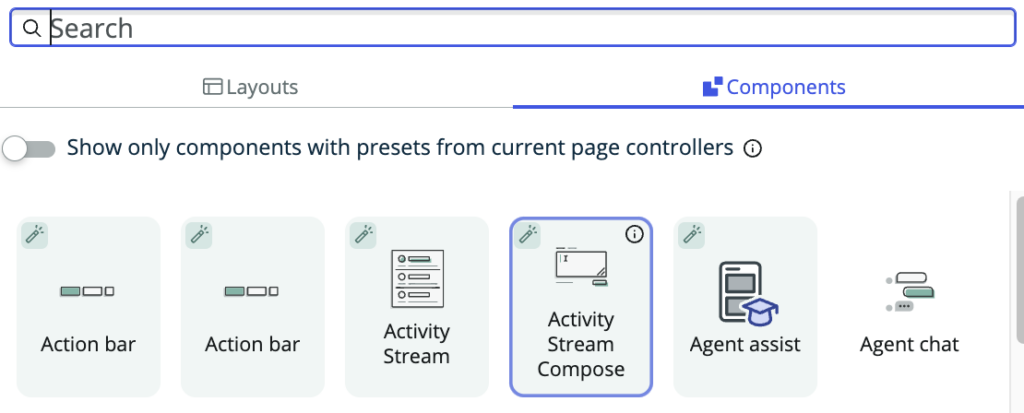
- Using the search bar on the top left, search for the component ‘Activity Stream Compose’ and select it.

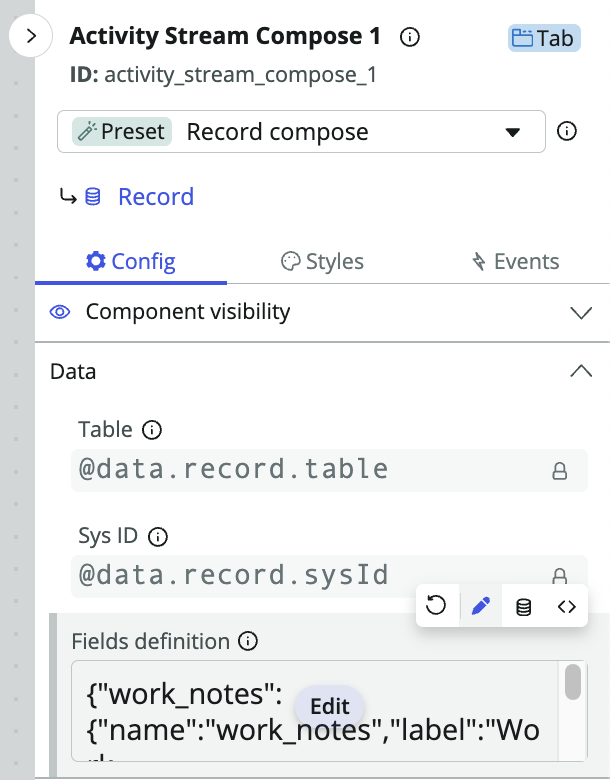
- Navigate to the ‘Config’ tab on the right panel.
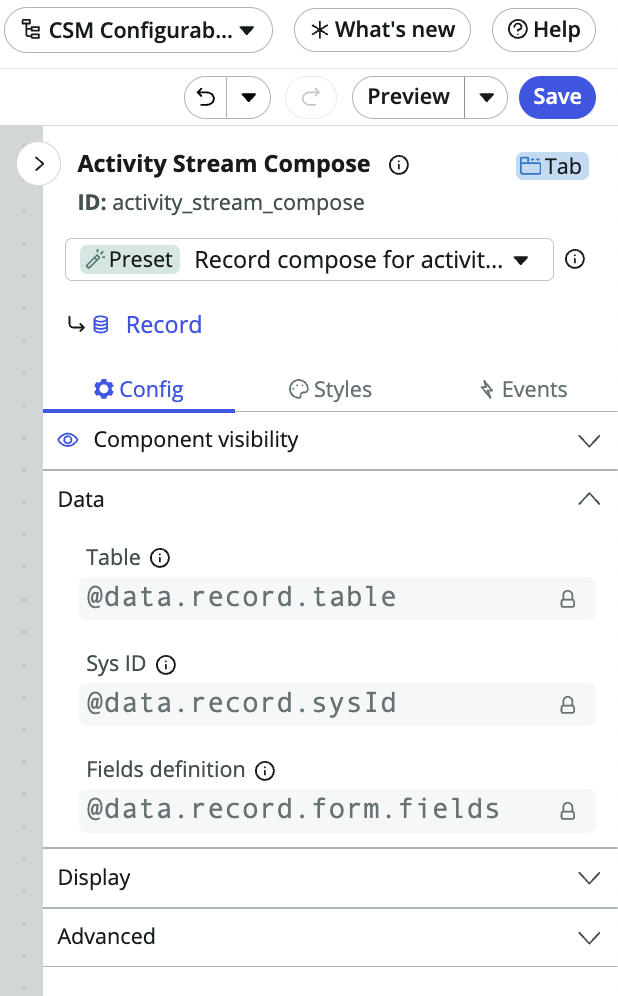
- Under the ‘Data’ section, we need to modify the values to dynamically pick the Parent Case record from the Case Task.
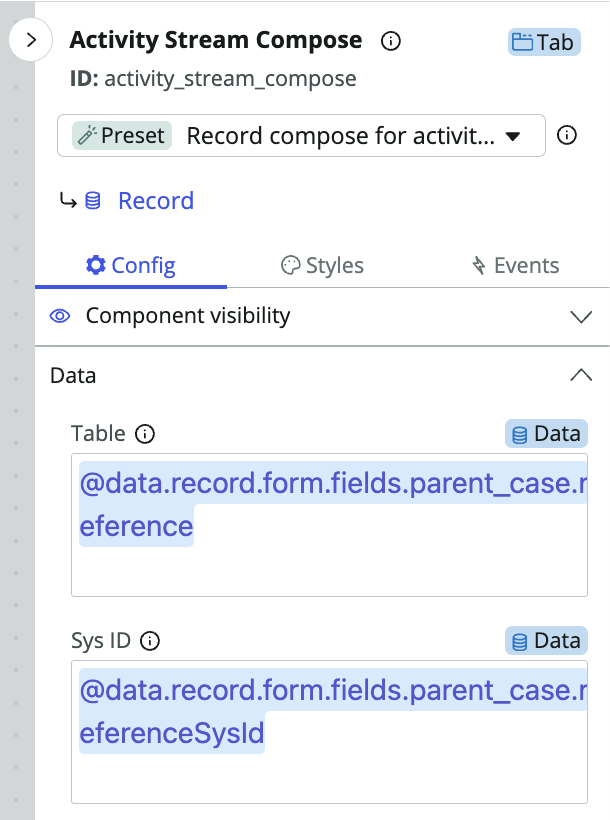
- Use data binding to set the value of ‘Table’ to ‘@data.record.form.fields.parent_case.reference’.
- Use data binding to set the value of ‘Sys ID’ to ‘@data.record.form.fields.parent_case.referenceSysId’.
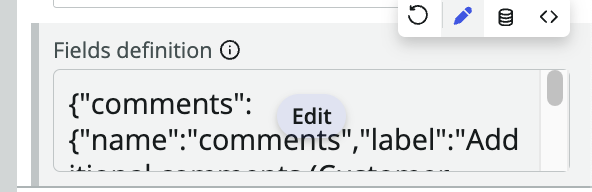
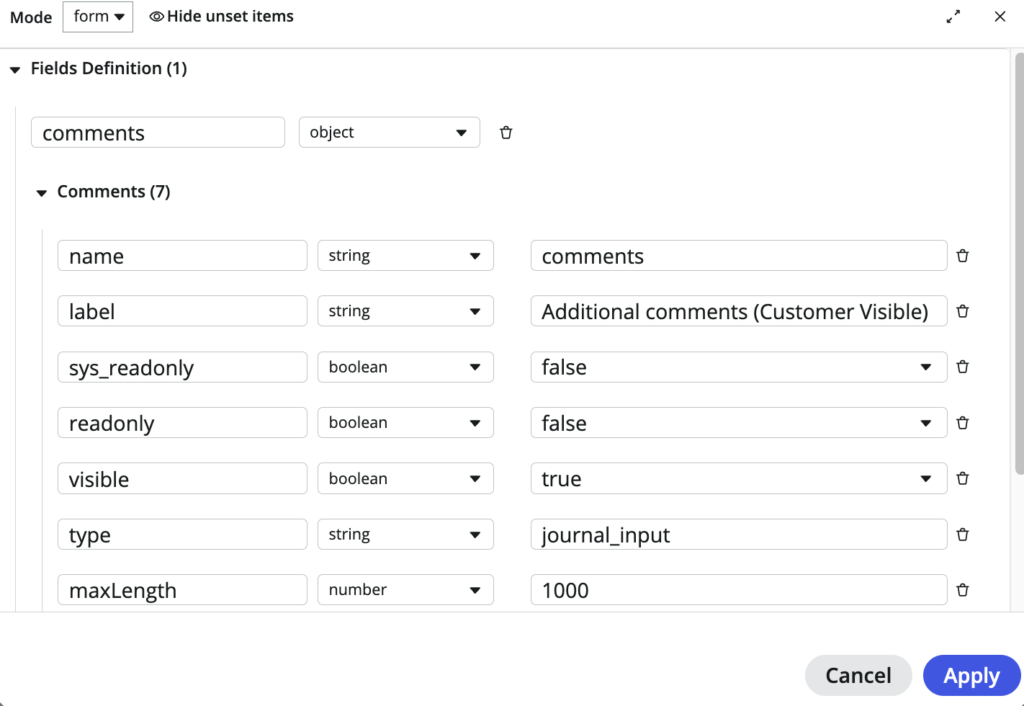
- For ‘Fields definition’, use static input and edit in the popup to remove the ‘work_notes’ object and keep only the ‘comments’ object.
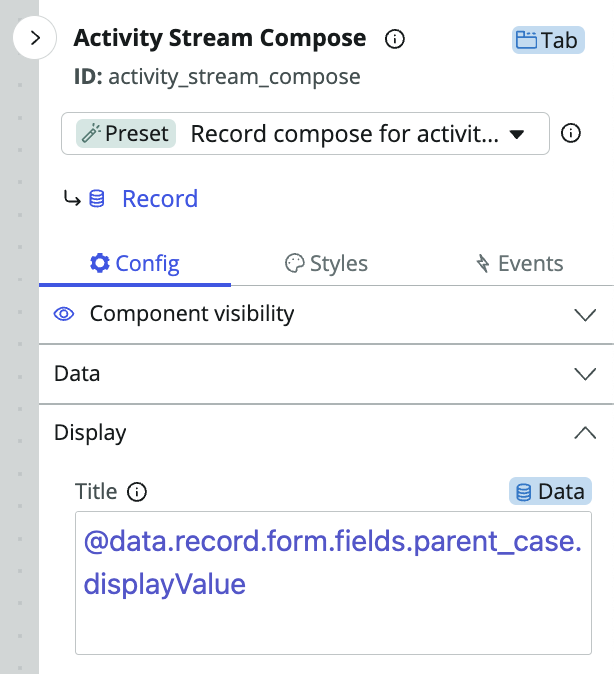
- Under the ‘Display’ section use data binding to set the value ‘Title’ to dynamically pick the Parent Case number. The value needs to be set to ‘@data.record.form.fields.parent_case.displayValue’.
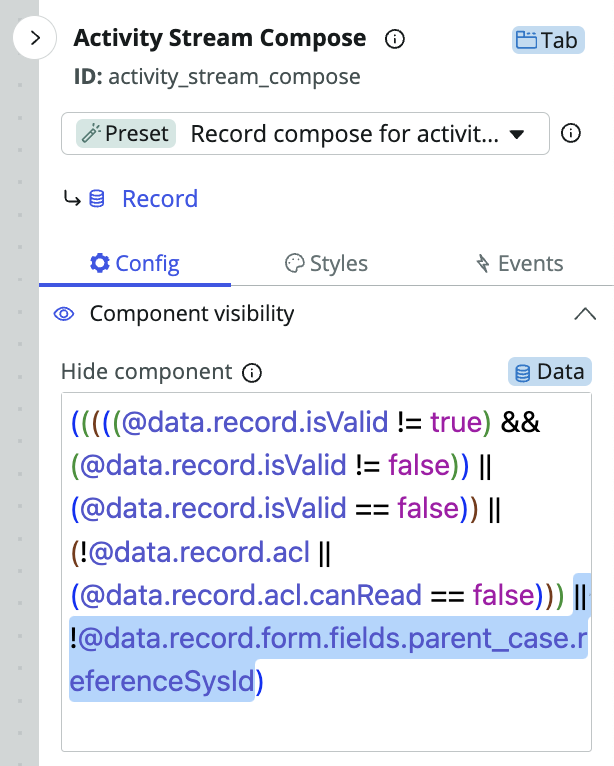
- We should also configure the ‘Component visibility’ section to hide the component if our Case Task does not have a Parent Case.
- Use data binding to set the value of ‘Hide component’. The value would already be set as a combination of conditions, we need to append ‘|| !@data.record.form.fields.parent_case.referenceSysId’ towards the end.
- Save the configurations using the ‘Save’ button at the top right.
- We have successfully added the ‘Comments’ section from the Parent Case onto the Case Task record.
- Next, we need to revive the ‘Work notes’ section for the Case Task.
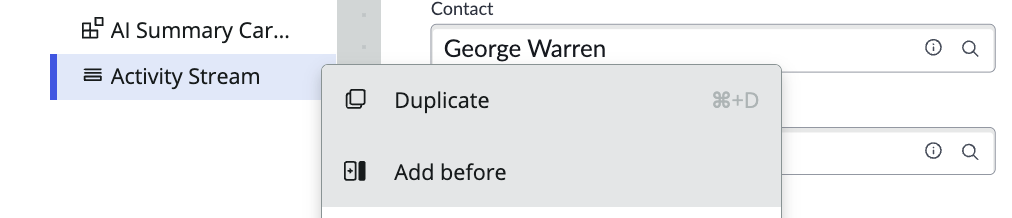
- Using the search bar on the top left, search for ‘sbs-right-bottom’ and select the component ‘Activity Stream’ present under it.

- Using the three dots beside the component, click on ‘Add before’ and select the ‘Activity Stream Compose’ component from the popup.
- Once the new component is added, select it and navigate to the ‘Config’ tab on the right panel.
- Under the ‘Data’ section, for ‘Fields definition’, use static input and edit in the popup to remove the ‘comments’ object and keep only the ‘work_notes’ object. (similar to step 14, just reversed)
- Save the configurations using the ‘Save’ button at the top right.
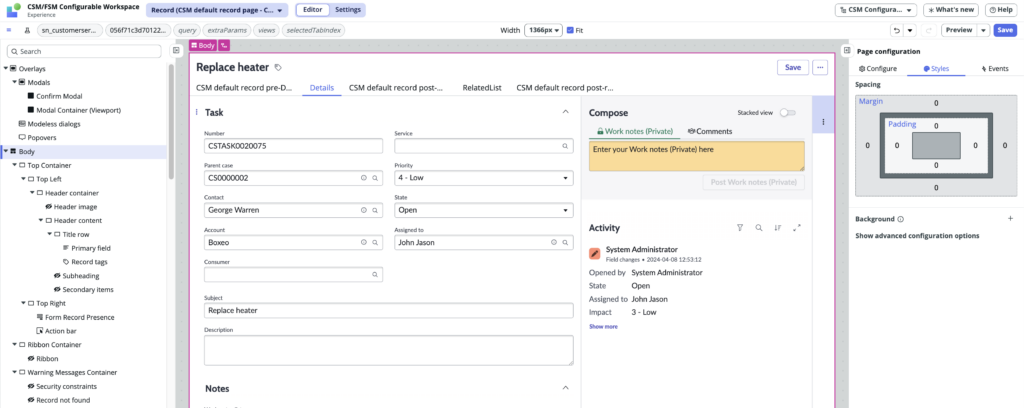
- If test values were filled in Step 8, then the UI builder screen would look something like below.
- Clean the cache with ‘cache.do’.
Verify the configuration
If all the 27 steps have been followed accurately, then the Case Task records that are linked to a Parent Case will render two separate journal inputs like below.
Any comments posted via the section on top will directly add comments on the Parent Case. If the Case Task is not linked to a Parent Case, the page would render without the comments section like below.
If the functionality is not working as expected, backtrack on the mentioned steps and verify whether all of them were executed correctly, else we can always start from the scratch.
Next steps
These steps can be replicated for all kind of related records and journal fields by just changing the table and field names, as long as the linked record is available on the form view of UI builder – this is mandatory since we utilise the data binding as @data.record.form.fields… in the configurations.