ServiceNow enables agents to create Incidents [incident] based on Cases [sn_customerservice_case], typically for internal break-fix situations. In these scenarios, the case’s Contact is assigned as the incident Caller, and the case’s Account is assigned as the incident Company.
In the CSM configurable workspace, we can access the ‘Customer Information’ and ‘Customer Activity’ tabs on case records. This article will guide us on how to extend the Customer Central functionality to Incident records and potentially to any record that references Contacts or Accounts.
Existing functionality
OOB record page for Case
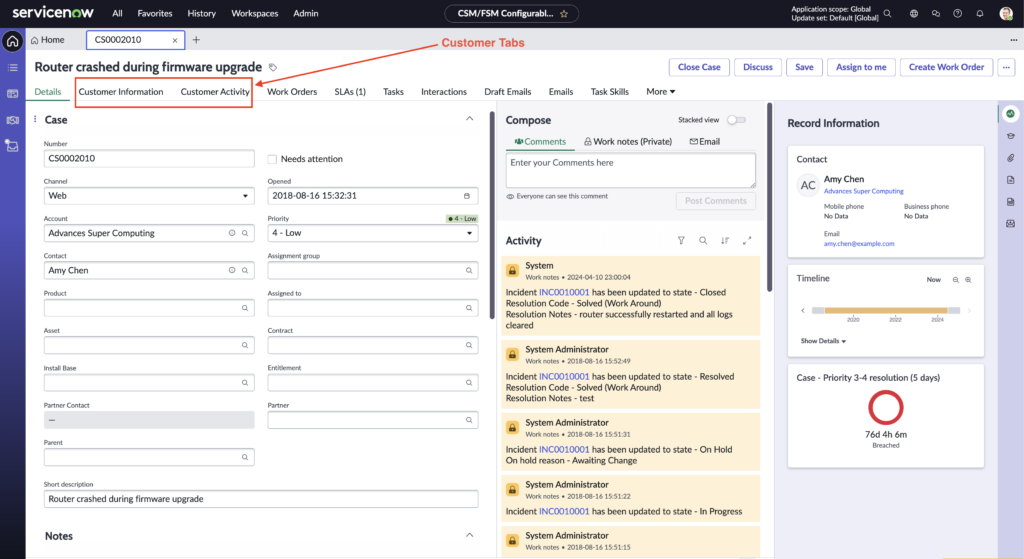
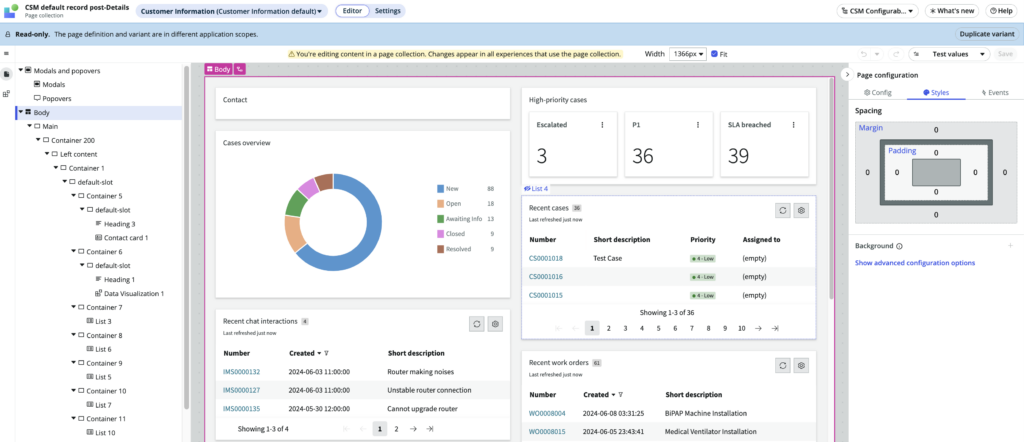
Below is how the screen layout looks for a record from the out-of-box Case [sn_customerservice_case] table. Notice the two ‘Customer Central’ tabs after the ‘Details’ tab.
OOB Customer Information tab
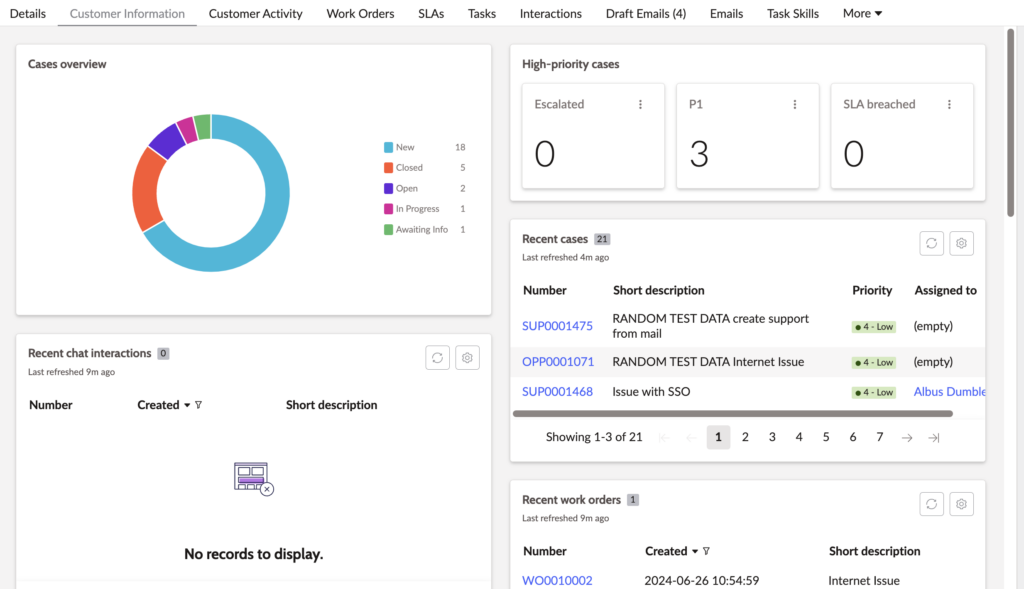
Below is how the screen looks on selecting the ‘Customer Information’ tab. We get a handful of pre-defined widgets displaying the data related to the Contact who has opened the case.
OOB Customer Activity tab
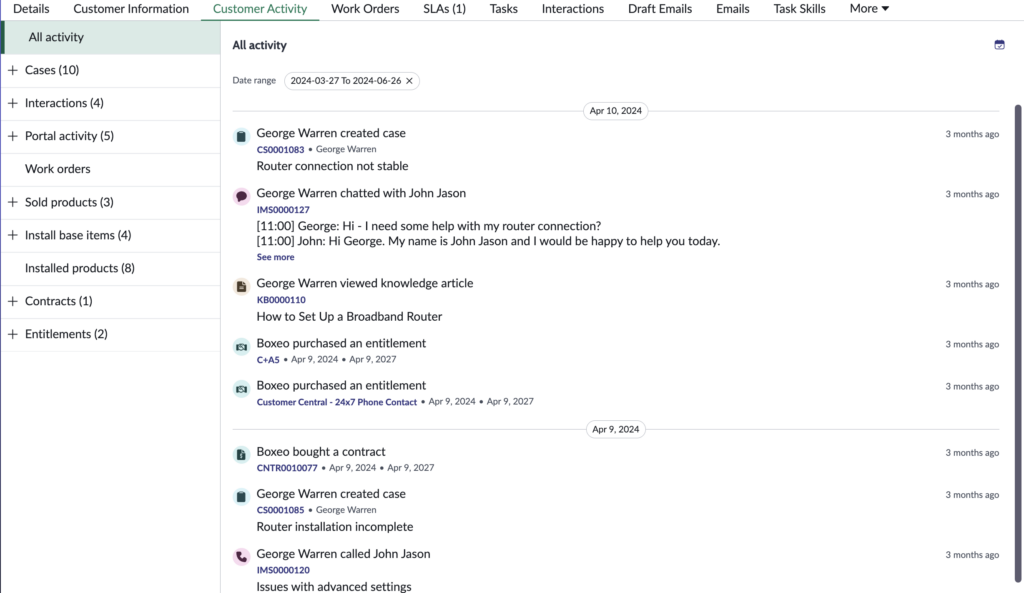
Below is how the screen looks on selecting the ‘Customer Activity’ tab. We get a holistic timeline view for the activity of the Contact who has opened the case.
Default screen layout for an Incident
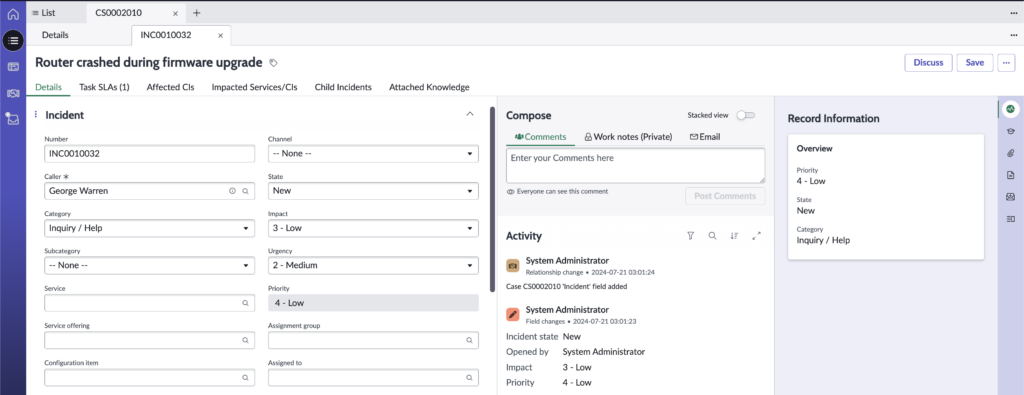
When an Incident is created from a Case using the ‘Create Incident’ button, below is how the Incident record looks like in the CSM workspace.
Configuration steps
Follow the steps listed below to make the ‘Customer Central’ tabs available for Incidents that are created from a Case.
Modify UX Screen Condition
- Set the application scope to ‘CSM Configurable Workspace’.
- Navigate to UI builder.
- From the ‘Page collections’ list, look for and open the ‘CSM default record post-Details’ record.
- https://instance.service-now.com/now/builder/ui/pc/06ece18461011110fa9ba6da704974b3

- Under the ‘Pages and variants’ list, look for and open the ‘Customer Information default’ record. Notice that the page is read-only.
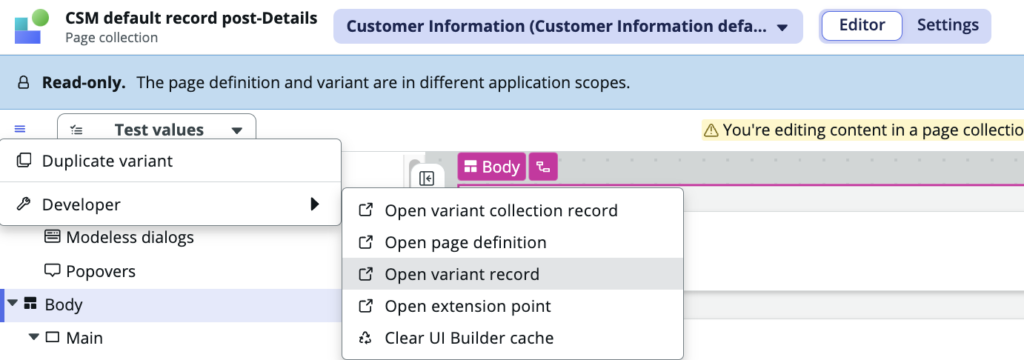
- From the hamburger menu at the top left, under ‘Developer’ click on ‘Open variant record’, it will take us to the UX Screen record in the backend.
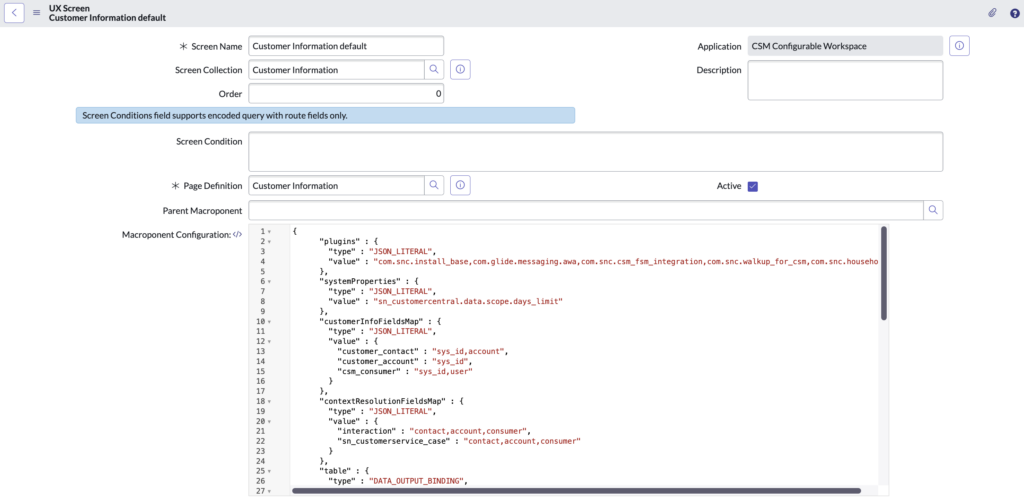
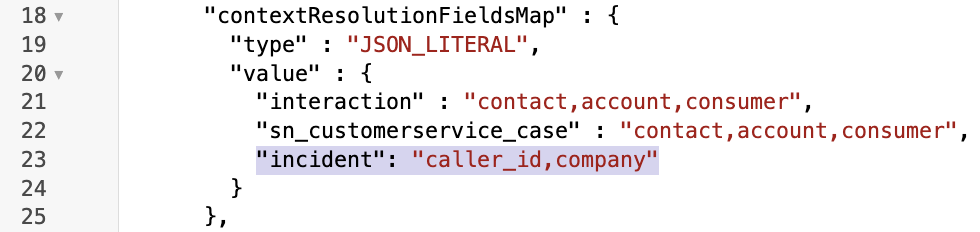
- In the Macroponent Configuration field, look for the object that sets the value for ‘contextResolutionFieldMap‘.
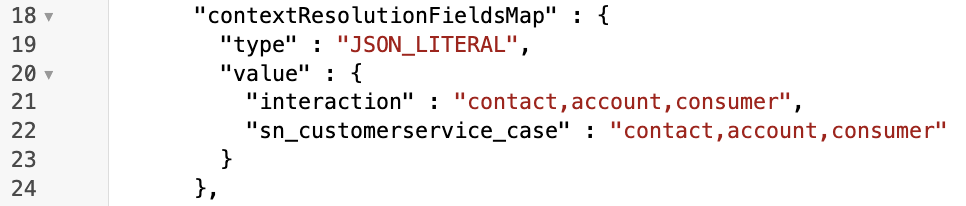
- We need to change this part to handle Incident records. Modify the component as below, save the record and remain on the form.
- Next, scroll to the bottom and open the record present under the ‘UX Screen Conditions’ related list.

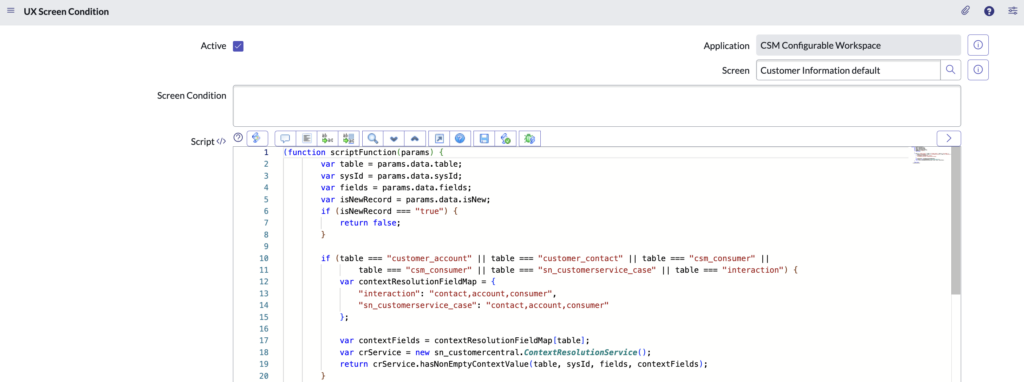
- In the script part of the screen condition record, look for the code snippet that checks for the table and sets the ‘contextResolutionFieldMap‘ object. It would be something like the below.
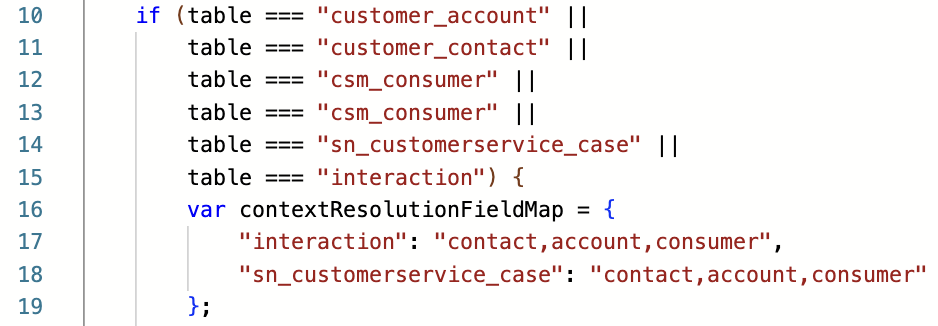
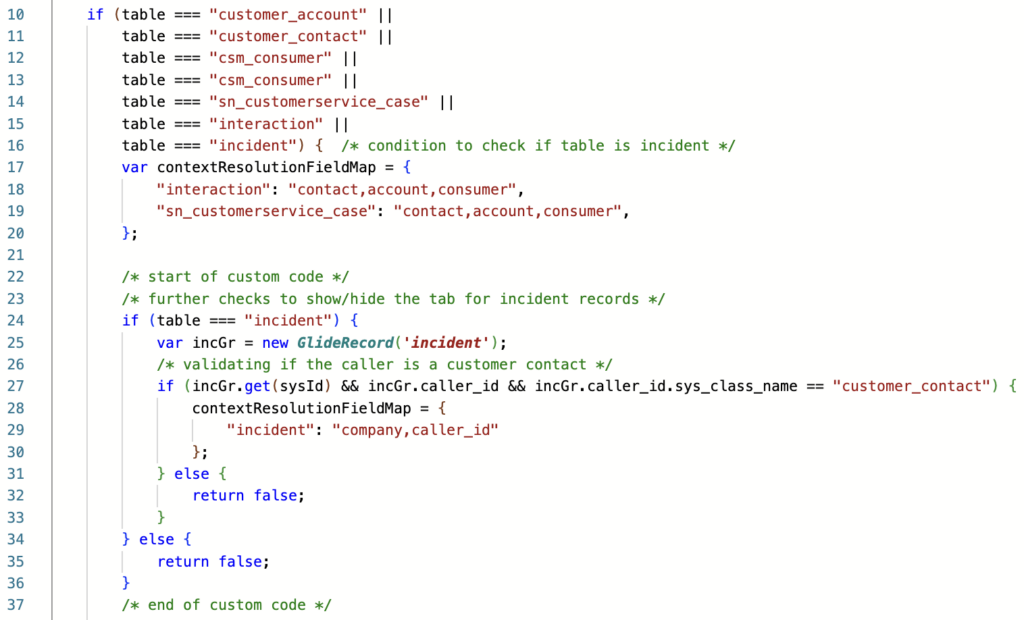
- We need to change this part of the code to accommodate the incident table and validate if the incident caller is a customer contact. Modify the script like below and save the record.
Modify Data Broker Server Script
- Set the application scope to ‘Customer Central’.
- Navigate to the table ‘sys_ux_data_broker_transform’.
- Search for and open the record named ‘Customer central – get context instance details’.
- https://instance.service-now.com/nav_to.do?uri=sys_ux_data_broker_transform.do?sys_id=7cbe4be63b1710109381266914efc421
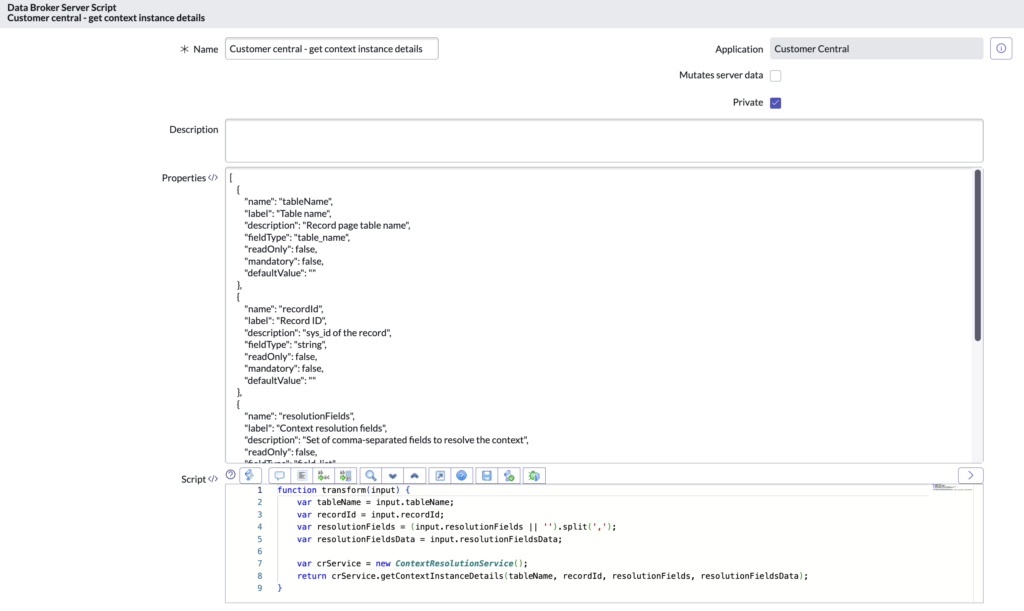
- In the script section,
- add a code snippet to handle incident records.
- save the record.
- Before –

- After –
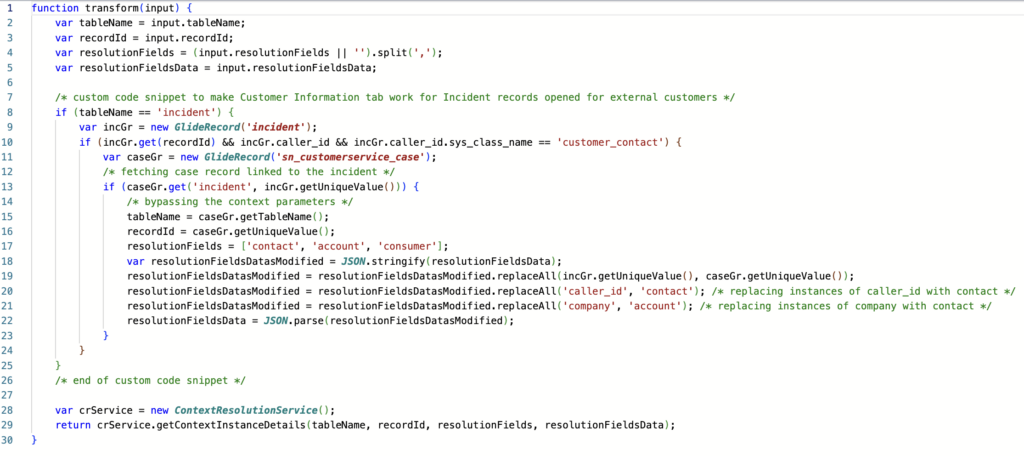
- Copyable version of the custom code snippet can be found here.
- Clean the cache with ‘cache.do’.
Verify the configuration
If all the 16 steps have been followed accurately, the ‘Customer Information’ tab will successfully render on the incident records that are linked to cases.
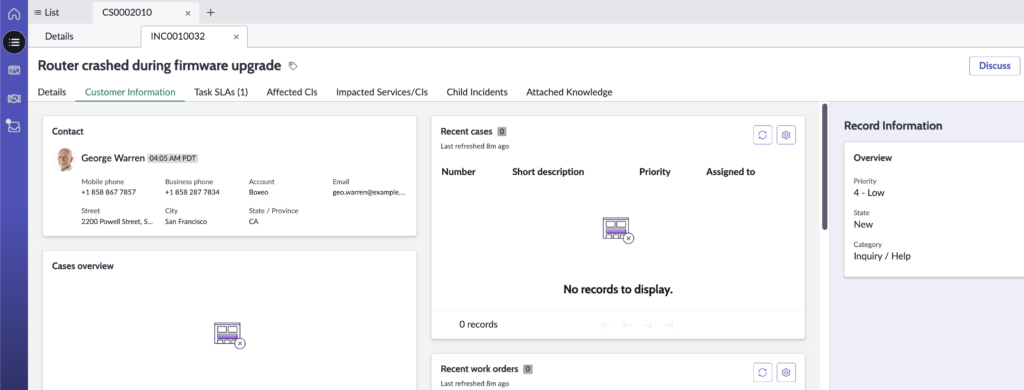
If the tab is still not visible, backtrack on the mentioned steps and verify whether all of them were executed correctly.
Next steps
- We still need to enable the ‘Customer Activity’ tab – repeat the configuration steps 1 to 10, except for Step 3, open the ‘Customer Activity default’ record in UI builder.
- Need to add/modify/remove reports? Create duplicate variants of the pages and set a lower value to its order.