An agent in ServiceNow’s Customer Service Management (CSM) uses the Interaction [interaction] table to document their initial contact with users seeking support. This interaction can occur through direct chat on the portal or via a phone call to the service desk. In cases of phone calls, the agent typically needs to verify the caller’s details before offering assistance. ServiceNow streamlines this verification process with the Lookup and Verify feature in the CSM workspace.
Out-of-box, the agent’s interaction screen appears as shown below, featuring the Lookup and Verify module on the contextual side panel to the right.
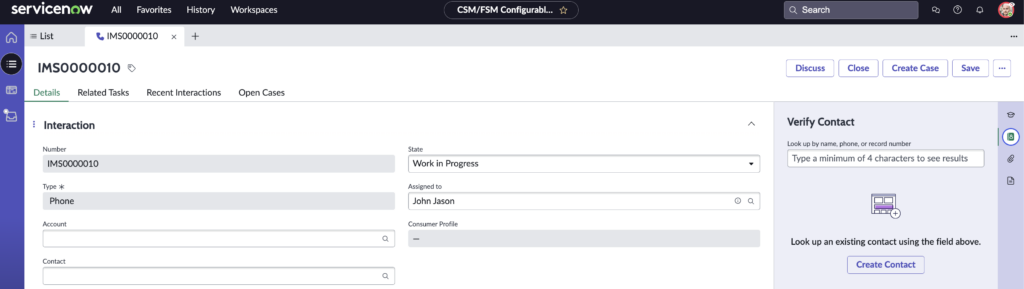
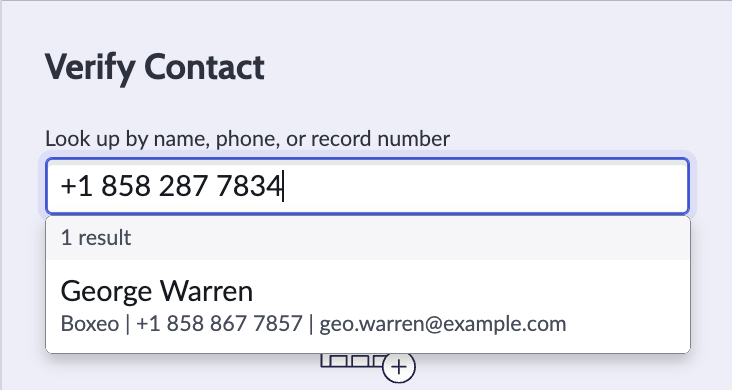
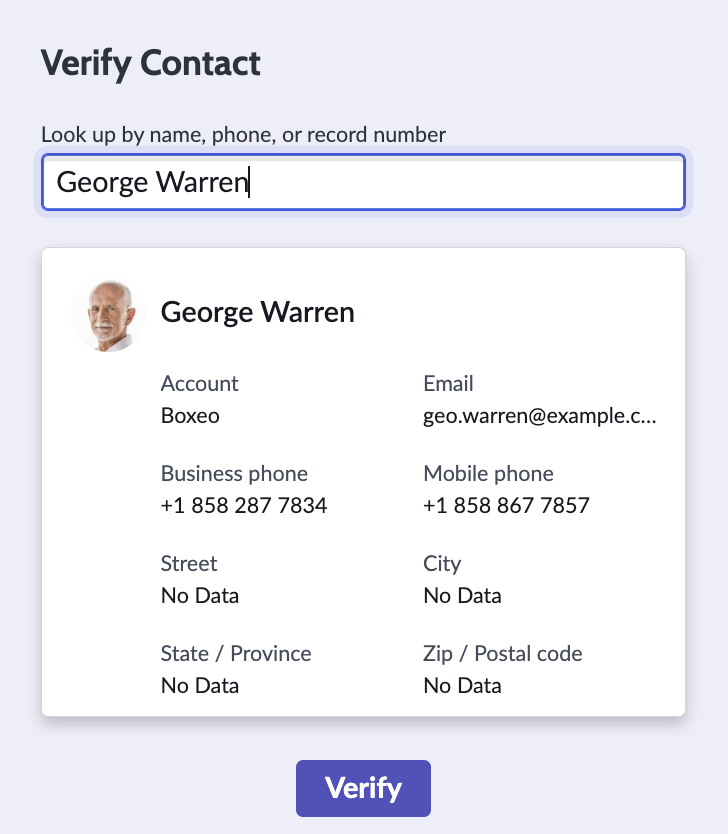
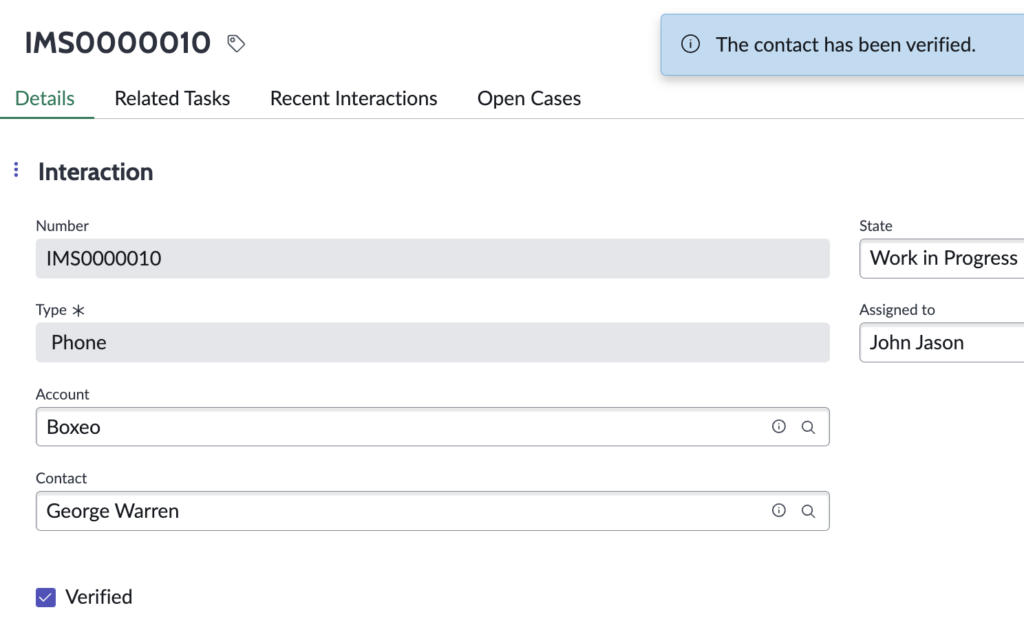
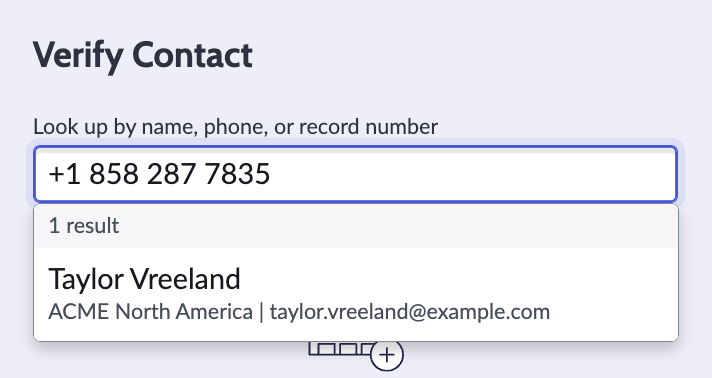
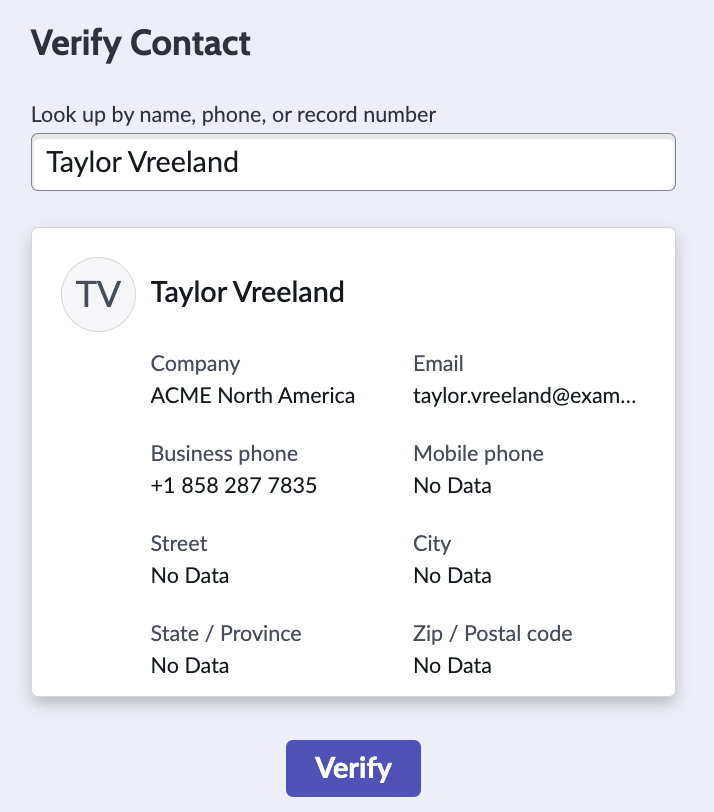
After the agent searches for the contact using identifiable information such as a phone number, they can then proceed to verify the contact. If this information has already been verified, such as through a customer portal login or authentication by Virtual Agent or by an IVR, the Verified check box on the interaction record is automatically checked.
Note – The Lookup and Verify section is visible for Interaction records that are in progress. The logged in user should have the role ‘sn_lookup_verify_user’.
Out-of-box, this useful feature works exclusively to verify users listed in the Contact [customer_contact] table. However, we encountered a business requirement to extend its functionality to include the entire User [sys_user] table. In this article, we will outline the steps to enhance the search capability to fetch data from all users in the system.
Configuration steps
Follow the steps listed below to enable Lookup and Verify features for the User [sys_user] table.
References on Interaction record
- Opened for [opened_for] and Company [core_company] fields are already present on the Interaction [interaction] table. Modify the form layout to make them visible.
Modify Data Broker Server Script
- Set the application scope to ‘CSM Configurable Workspace Lookup and Verify’.
- Navigate to the table ‘sys_ux_data_broker_transform’.
- Search for and open the record named ‘Verify transform’.
- https://instance.service-now.com/nav_to.do?uri=sys_ux_data_broker_transform.do?sys_id=1694d0e6777210102c30945caa1061ff
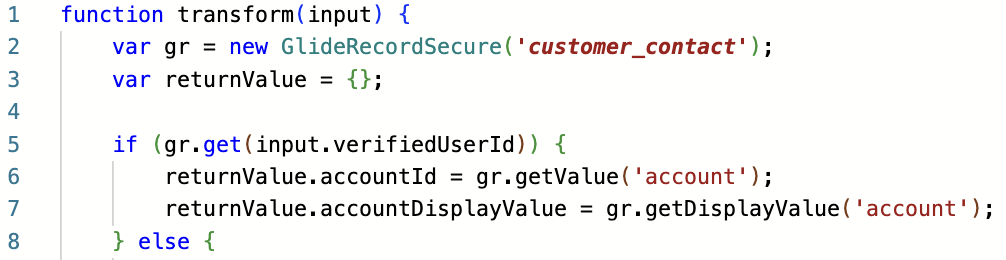
- In the script section,
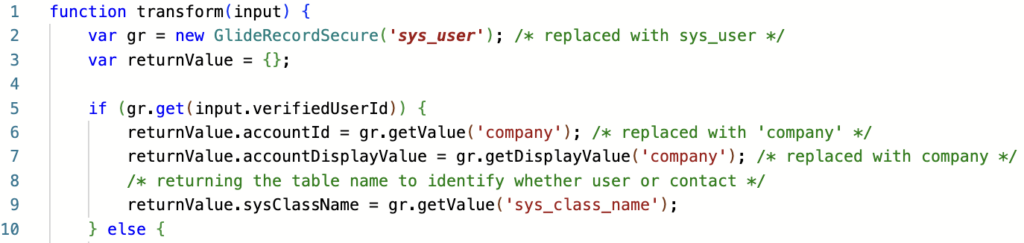
- replace the occurrences of ‘customer_contact’ with ‘sys_user’.
- replace the occurrences of ‘account’ with ‘company’.
- add a line of code to identify the record class [sys_class_name].
- save the record.
- Before –
- After –
- Note – Make sure to enable a sync between ‘Account’ and ‘Company’ fields on the Contact [customer_contact] table if not already in place. This will ensure that the existing functionality is not affected.
Modify UX Client Script
- Navigate to the table ‘sys_ux_client_script’.
- Search for and open the record named ‘verifyResult’.
- https://instance.service-now.com/nav_to.do?uri=sys_ux_client_script.do?sys_id=84a34534778310102c30945caa106179

- In the script section,
- add a snippet to handle records with ‘sys_class_name’ = ‘sys_user’.
- save the record.
- Before –

- After –

Modify Lookup Search Configuration
- From the left navigator, navigate to
- Workspace Experience -> Lookup and Verify -> Configuration
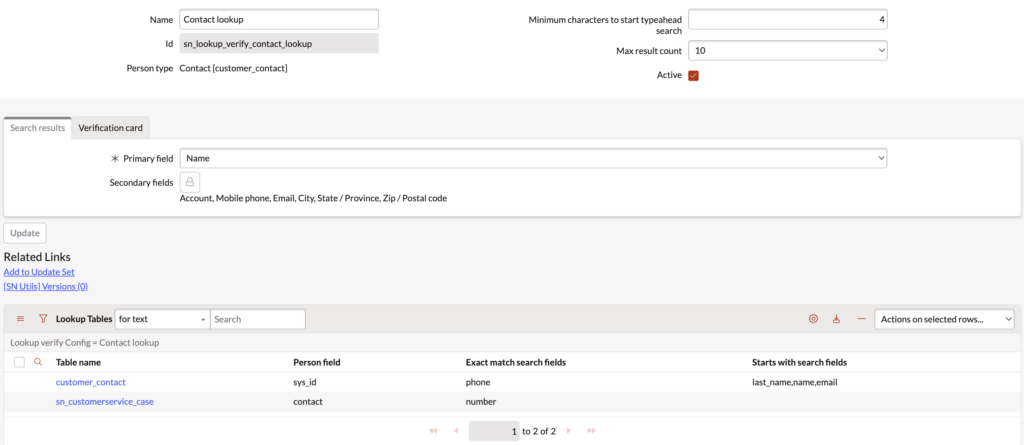
- Open the record ‘Contact Lookup’.
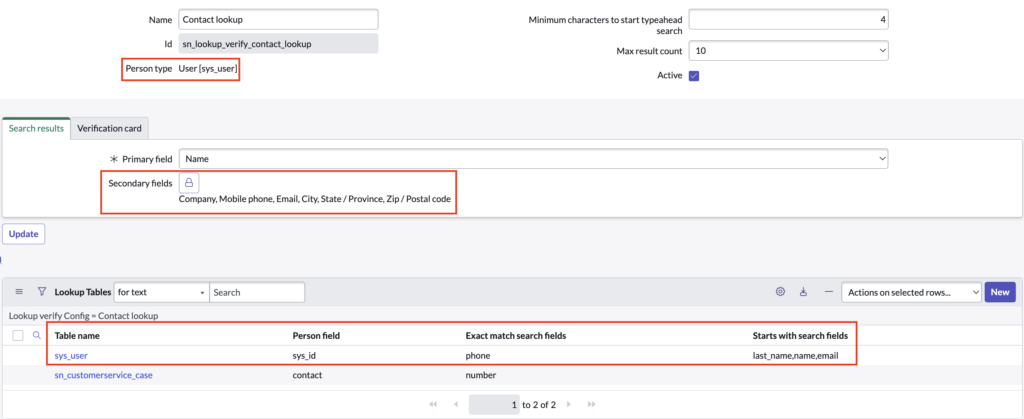
- We need to modify this record and the records in the related list to enable search from the ‘sys_user’ table instead of the ‘customer_contact’ table.
- Before –
- After –
- Note – Most of the fields are read-only, temporary ACL modifications or usage of scripts might be needed to override the values.
- Clean the cache with ‘cache.do’.
Verify the configuration
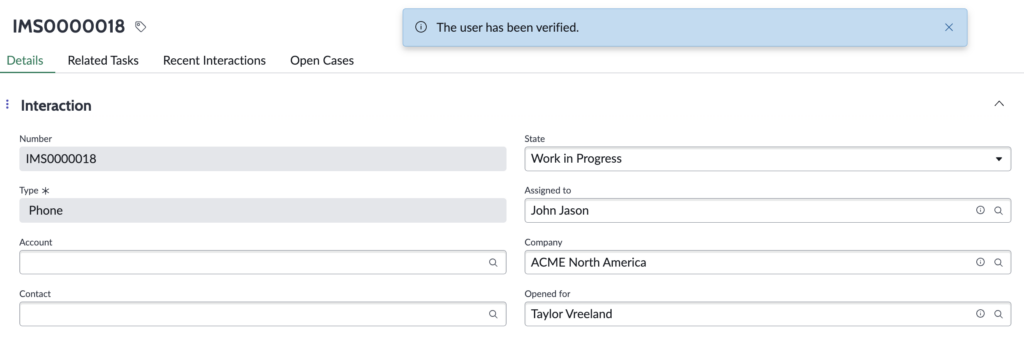
If all the steps have been followed accurately, using the Lookup and Verify action, search with name, phone numbers of records present in the User [sys_user] table. The verification should populate the ‘Company’ and ‘Opened for’ fields on the form. There should be no functional change for the Contact verification that was available earlier.
Next steps
Getting a direct link to the components that require modification has now made it easier to configure. Go ahead and try to identify the components given in Step 5 and Step 9 from within UI builder.